How to set up a Postgres on GCP without Cloud SQL
When I started to build Cafebean (an open coffee bean database), I decided to use Firestore as my document database for the beans & roaster data. As I add the ability for users to reviews beans, I need a relational database for that. I chose PostgreSQL because I’ve used it in production before, and it’s relatively straightforward to set up.
Google actually offers a hosted version of Postgres which is higly reliable, and fully-featured, but it comes at a higher price tag.
CloudSQL’s cheapest option is $9 a month, whereas the option I’ll show you below costs closer to $3 dollars a month.
The GCP Free Tier comes with 1 free f1-micro Compute instance, so we’ll take advantage of that.
In this post, I’ll show you how I connected this Posgres instance my Golang app, which is deployed via Cloud Run. I used this tutorial from Google as a guide.
Initial Setup
For this example, I’m going to be using my cafebean project as an example, but feel free to name your project & resources anything you want.
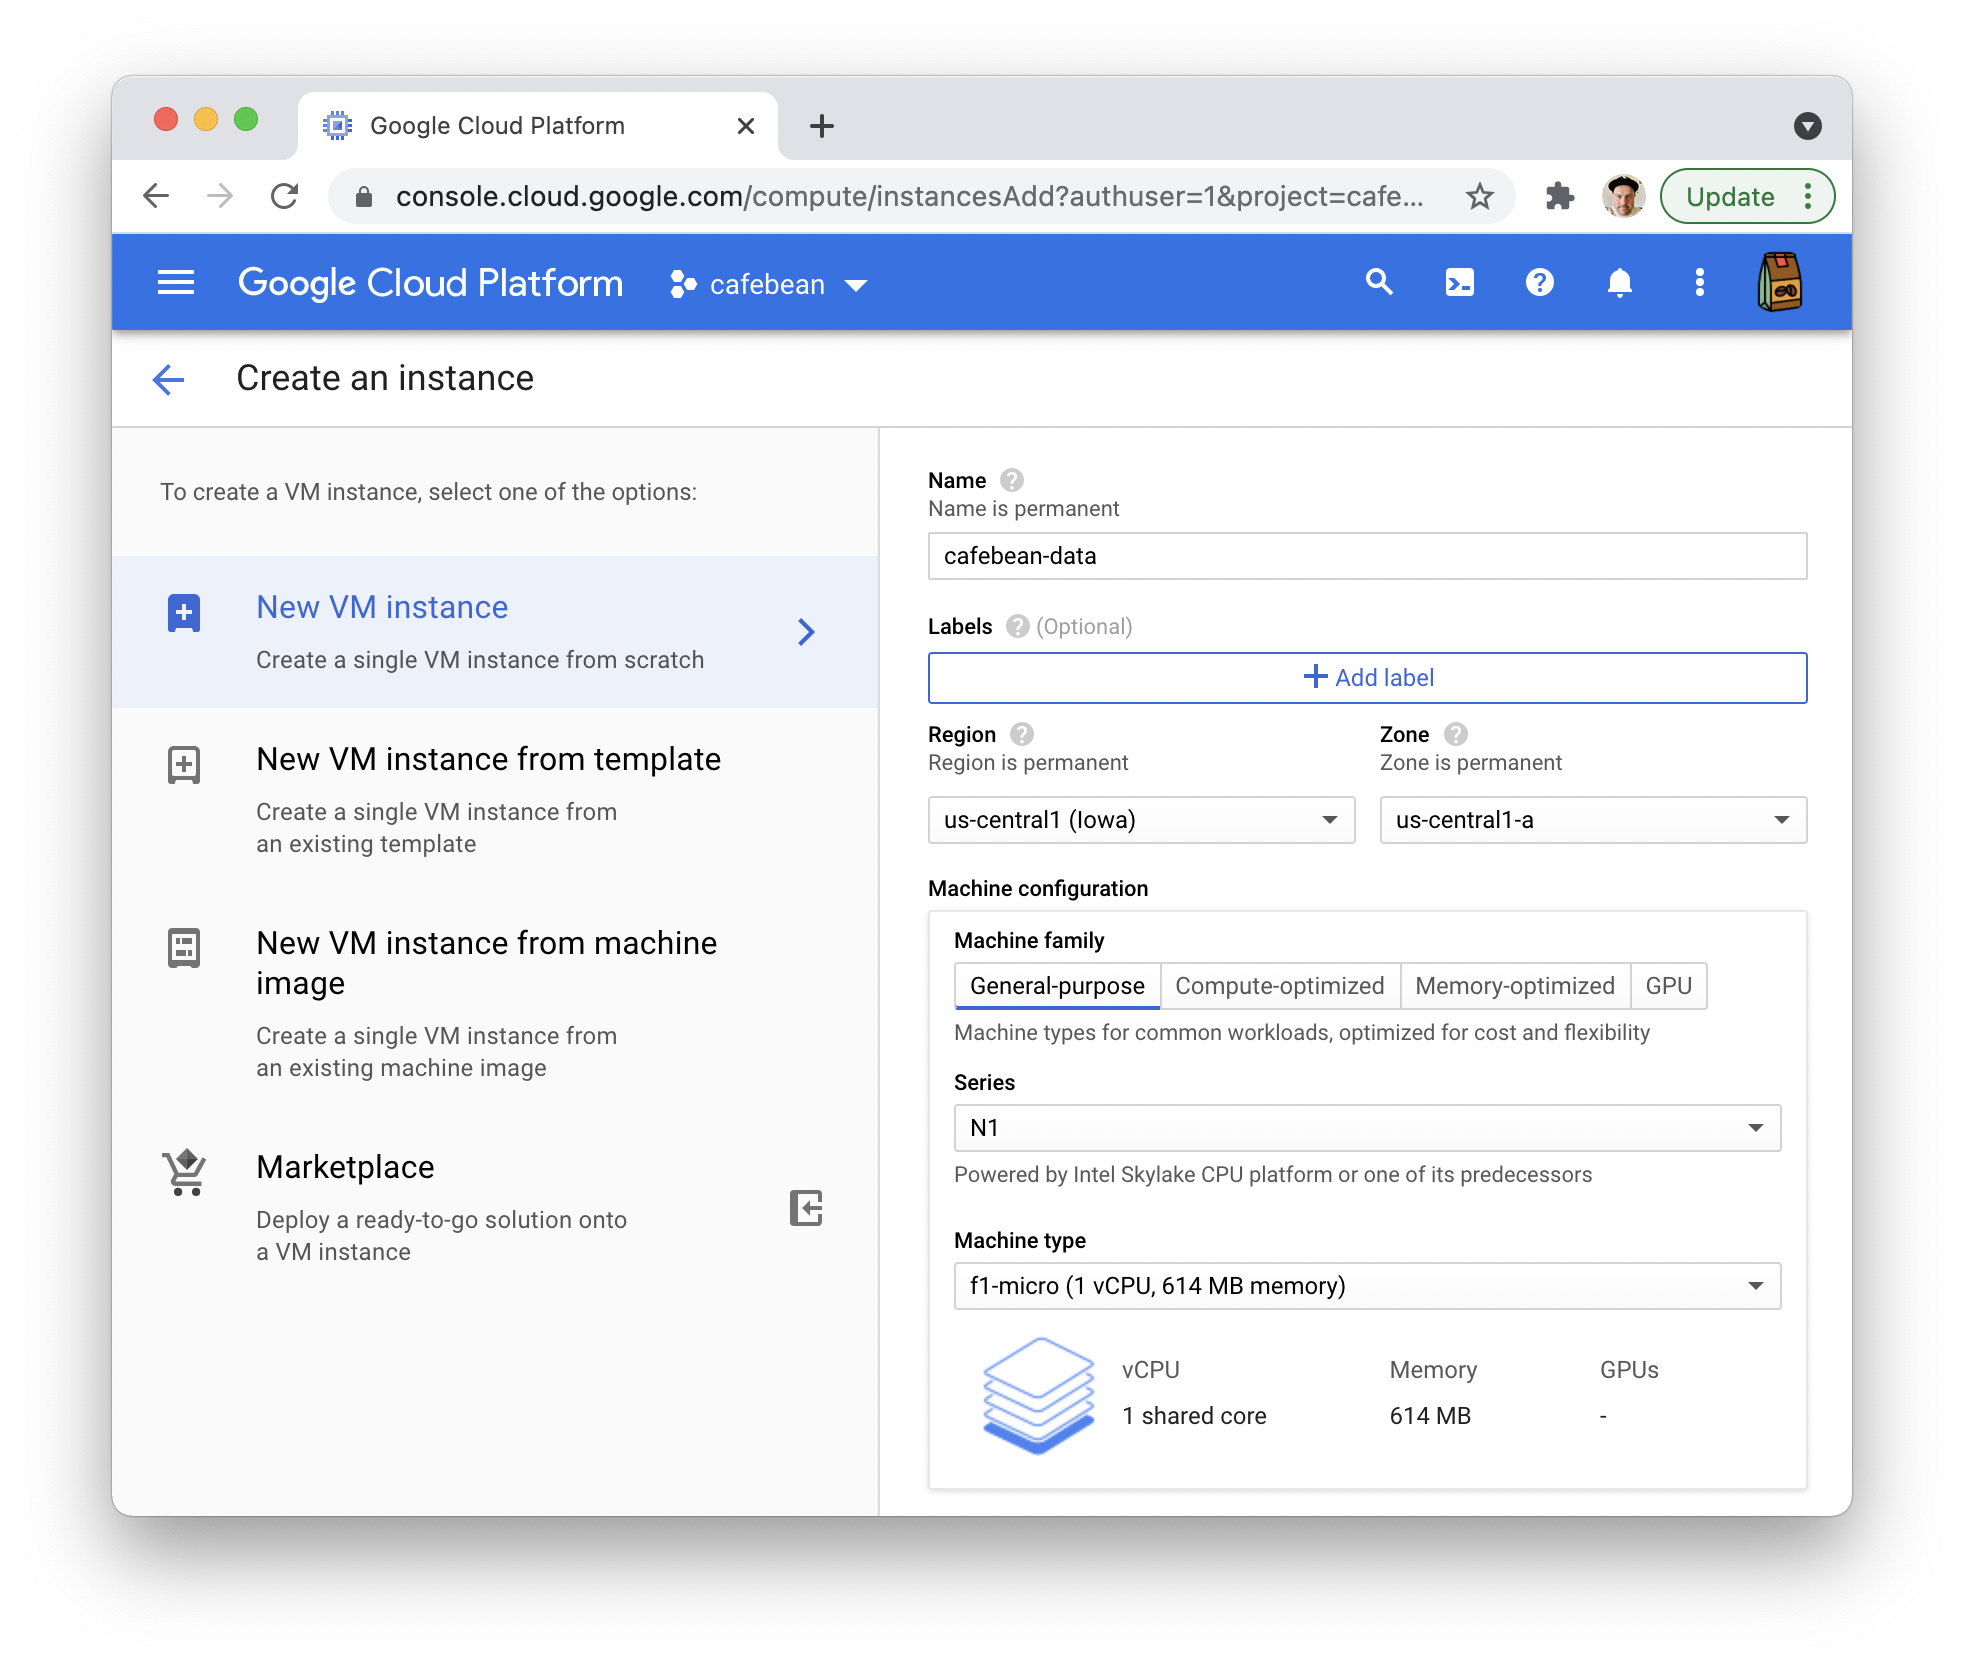
Create a Google Cloud project and enable billing. Install the Google Cloud SDK. Now it’s time to create an instance.
Enter a name for your instance and use the default region. In Machine Configuration, choose General Purpose, Series N1, Machine type f1-micro (1 vCPU, 614 MB memory). It seems like a dinky machine, but it’s only serving one purpose: handing a single database connection to a single client. If my site grows, it should be easy to scale up.
NOTE: Compute Engine has a nice feature where you can deploy a container to an instance, and we could easily deploy the postgres image, but I’m going to show you how to install it manually.
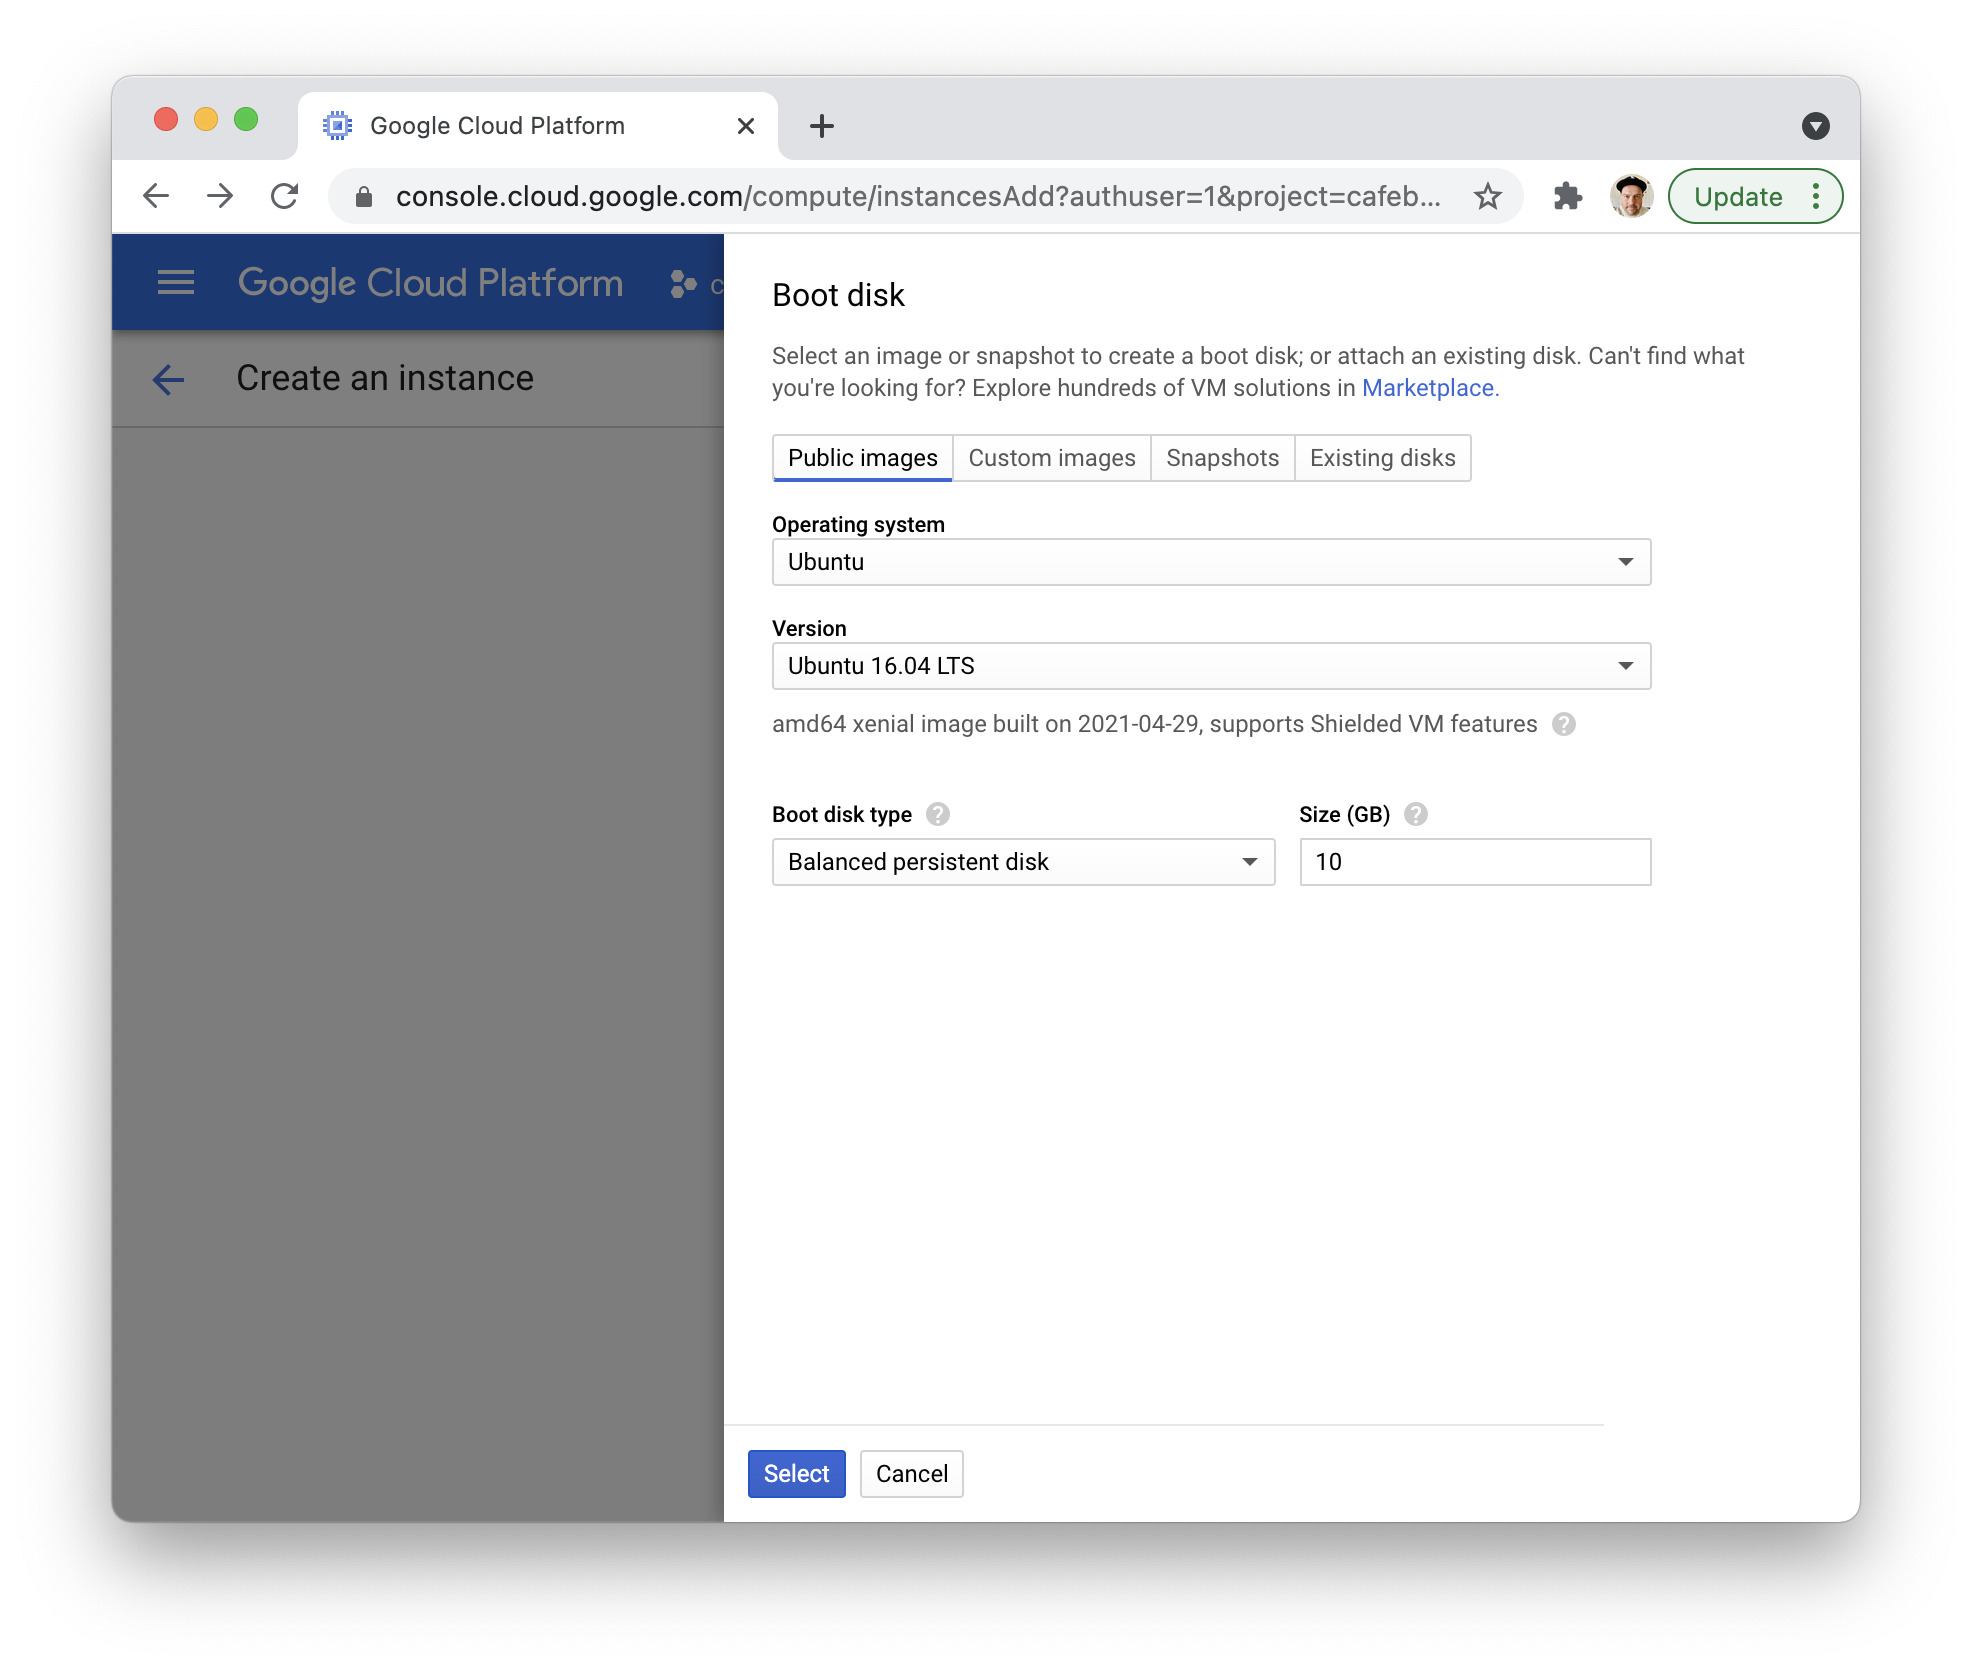
For the boot disk, choose the latest Ubuntu version:
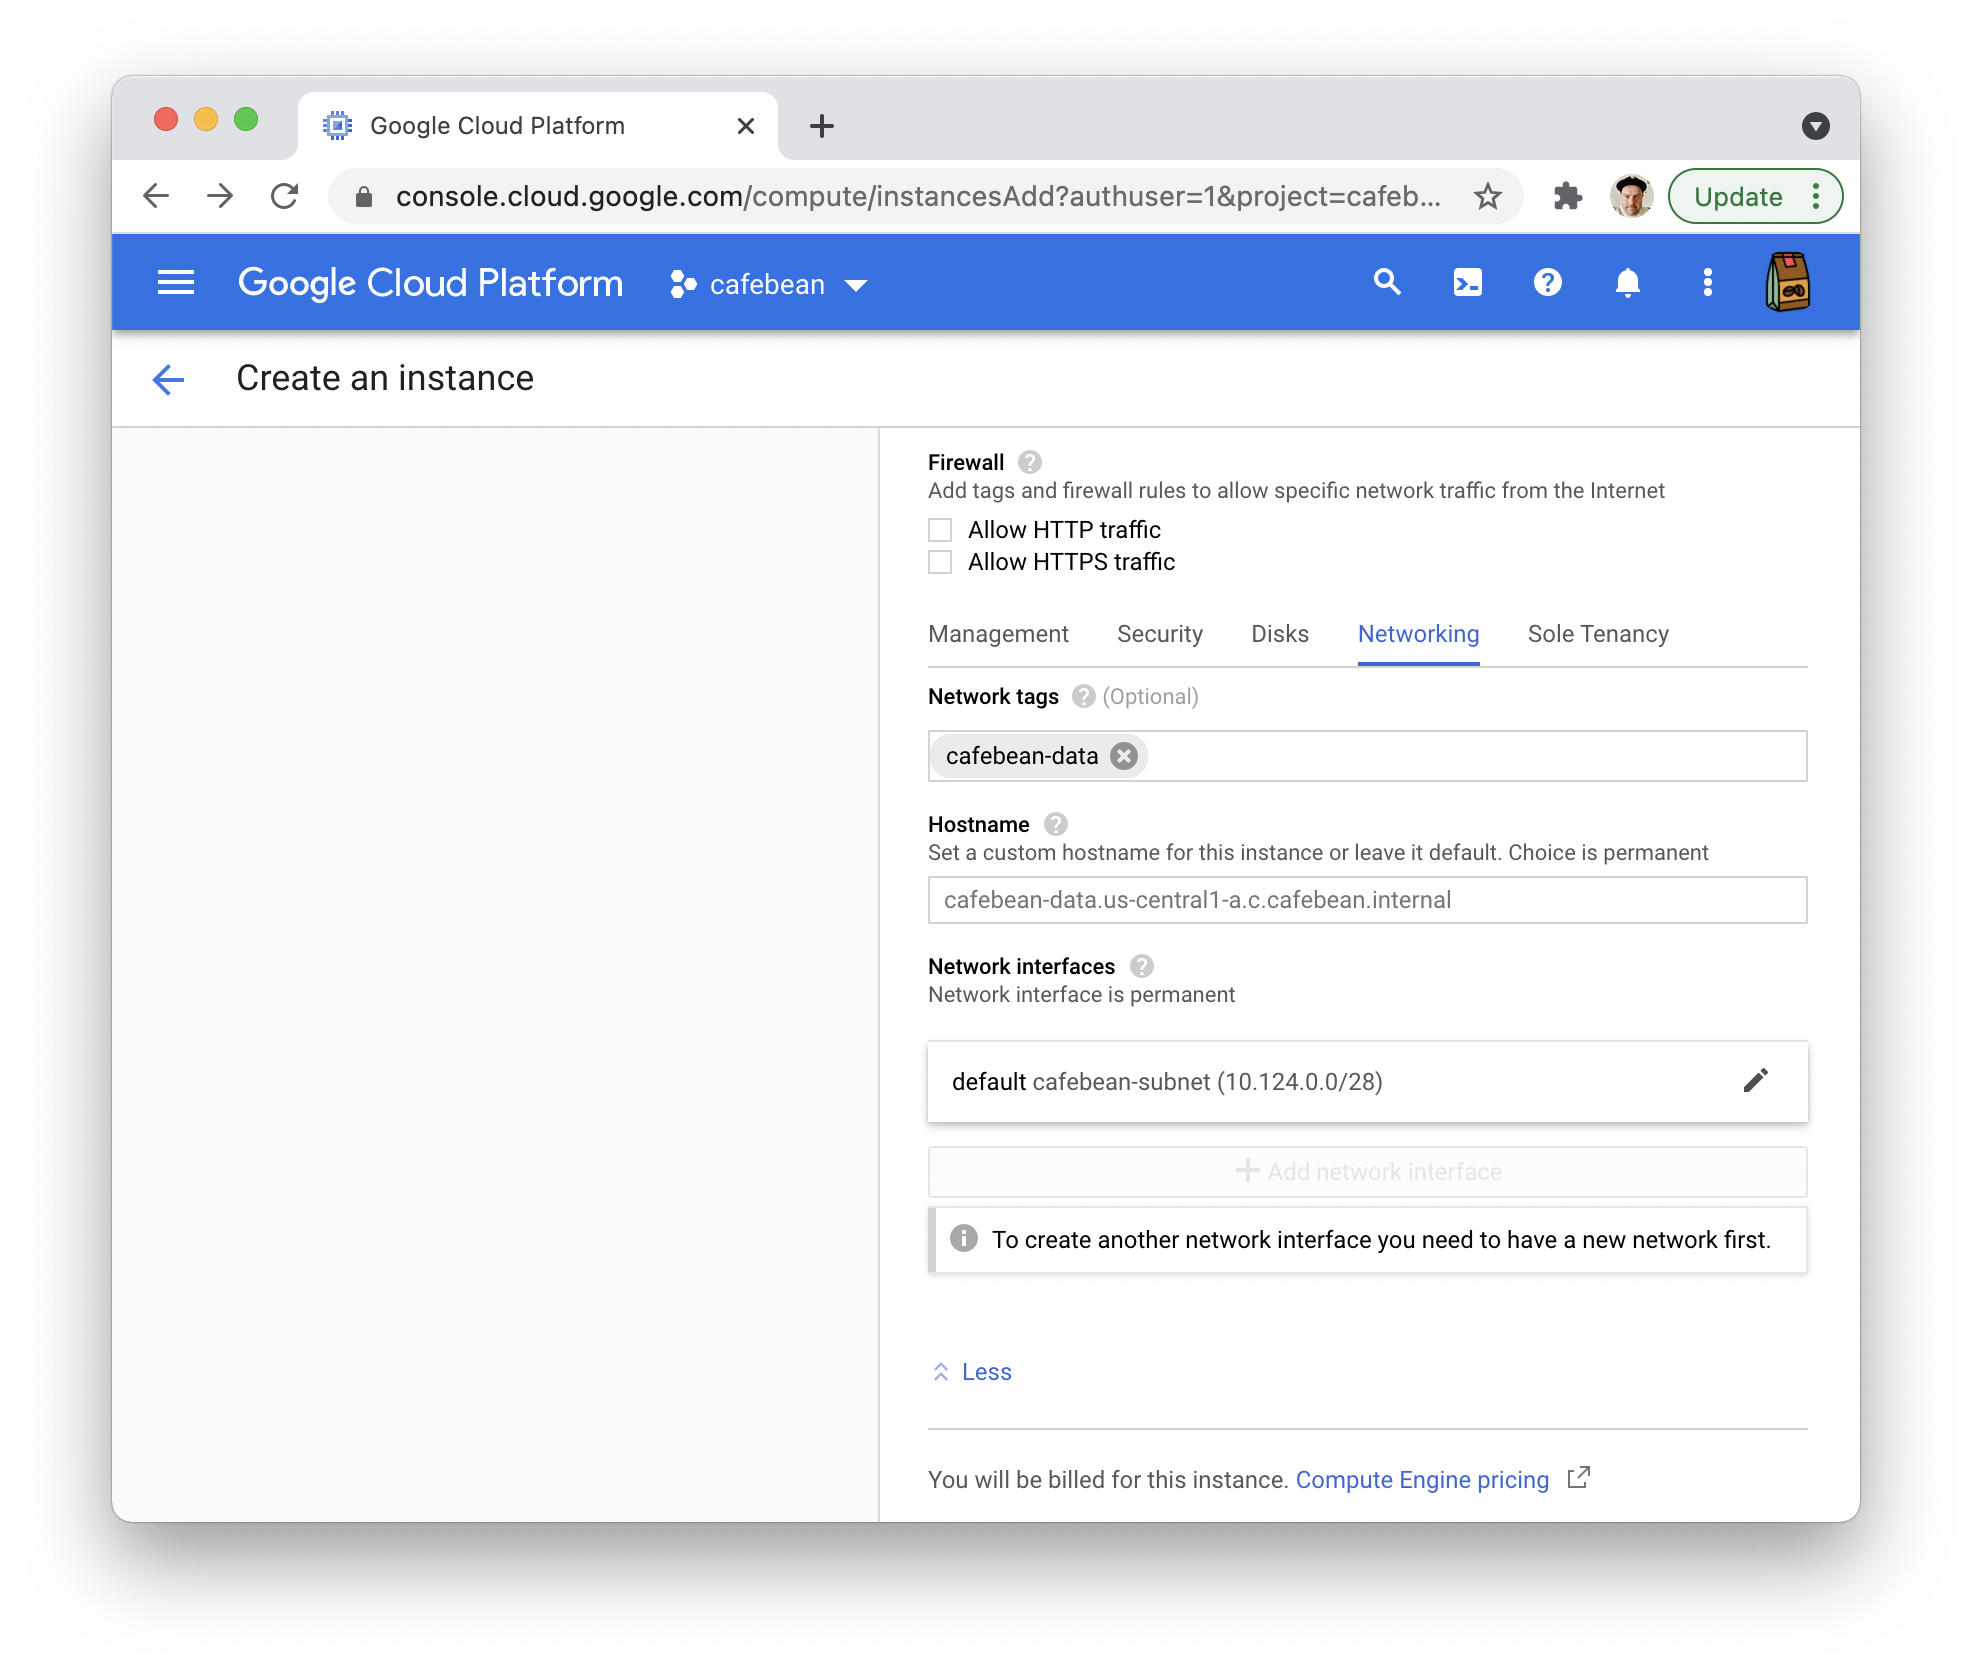
Finally, in the Firewall > Networking section, add a network tag:
Click Create and you should have an instance running in a few minutes.
❯ gcloud beta compute instances list
NAME           ZONE           MACHINE_TYPE  PREEMPTIBLE  INTERNAL_IP  EXTERNAL_IP   STATUS
cafebean-data  us-central1-a  f1-micro                   10.128.0.8   35.225.71.58  RUNNING
Setting up Postgres
Let’s connect to the instance with ssh:
> gcloud beta compute ssh "cafebean-data" \
    --zone "us-central1-a" \
    --project "cafebean"
Let’s do a software update and install the latest Postgres libraries:
> sudo apt update
> sudo apt -y install postgresql-12 postgresql-client-12
Check to make sure it’s running:
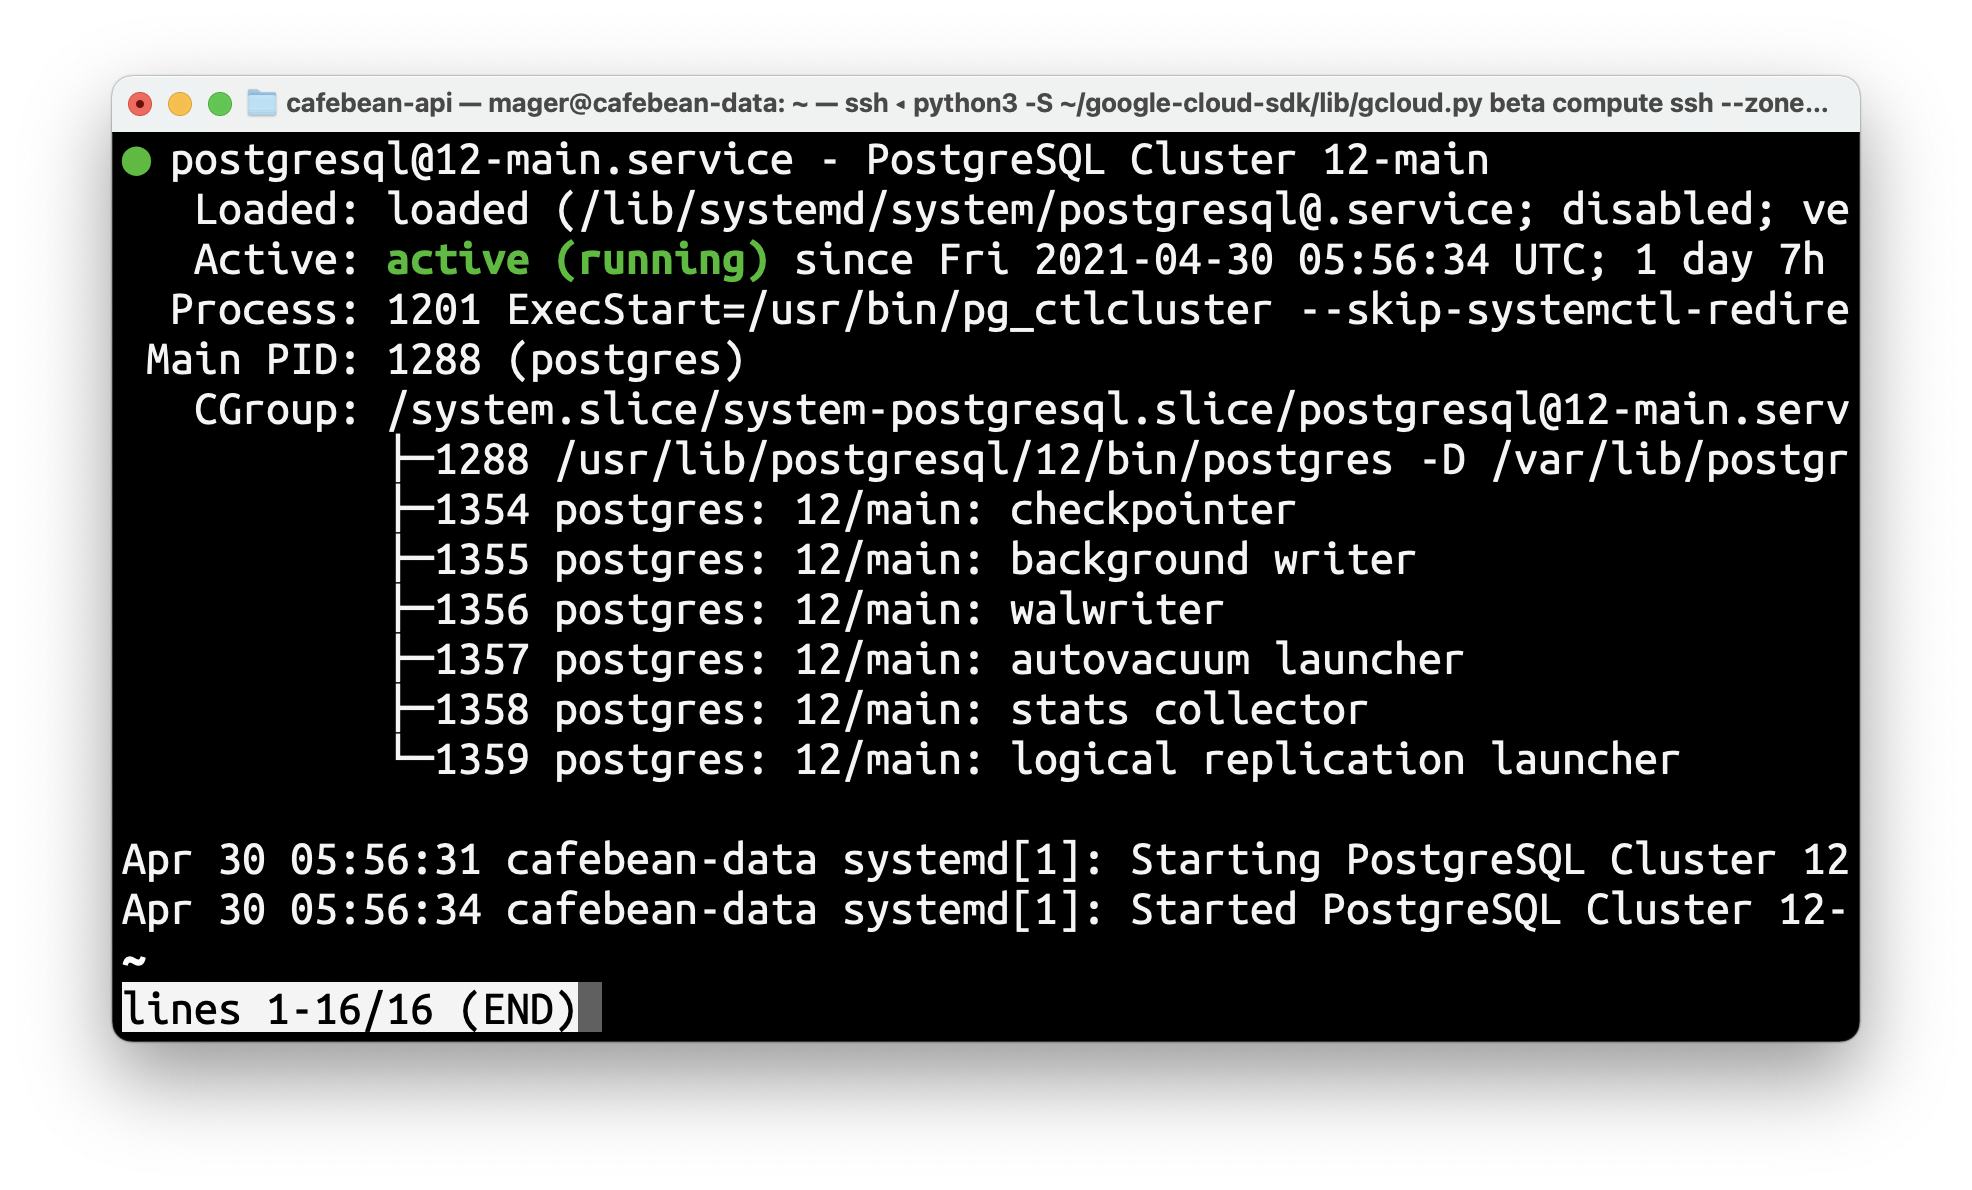
> systemctl status postgresql.service
> systemctl status postgresql@12-main.service
> systemctl is-enabled postgresql
You should see something like this:
Fire up psql with user postgres:
> sudo -u postgres psql postgresSet a password:
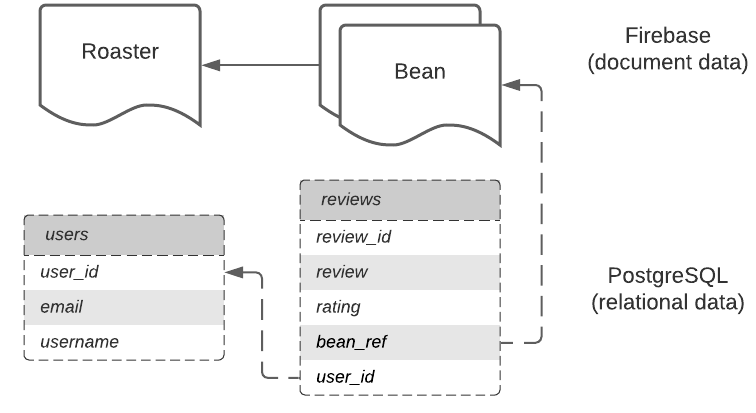
postgres=# \password postgresAnd let’s add some data. First we’ll create two tables: users and reviews (see diagram above):
CREATE TABLE users (
    user_id INT GENERATED ALWAYS AS IDENTITY,
    email TEXT NOT NULL,
    username VARCHAR(20) NULL
);

CREATE TABLE reviews (
    review_id INT GENERATED ALWAYS AS IDENTITY,
    user_id INT,
    bean_ref VARCHAR(20) NOT NULL,
    rating FLOAT NULL,
    review TEXT NULL,
    updated_at TIMESTAMP NOT NULL DEFAULT NOW()
);
Finally, let’s add some dummy data so we can query it later:
INSERT INTO users(email, username)
    VALUES('test@test.com', 'testuser');

INSERT INTO reviews(user_id, bean_ref, rating, review)
    VALUES(1, '709xkHwG8QYitVsrgX2P', 4.3, 'Amazing');
Quit postgres with \q.
Talking to the instance from your local machine
As it stands now, the instance is completely locked down from external traffic. To start, we’ll update Postgres’ settings to allow traffic our local IP only, and then later I’ll show you how I connected to my app in Cloud Run.
Open the pg_hba.conf config file (HBA stands for host-based authentication):
> sudo vi /etc/postgresql/12/main/pg_hba.confHead to the bottom of the page and add you IP address (you can find your IP at http://httpbin.org/ip).
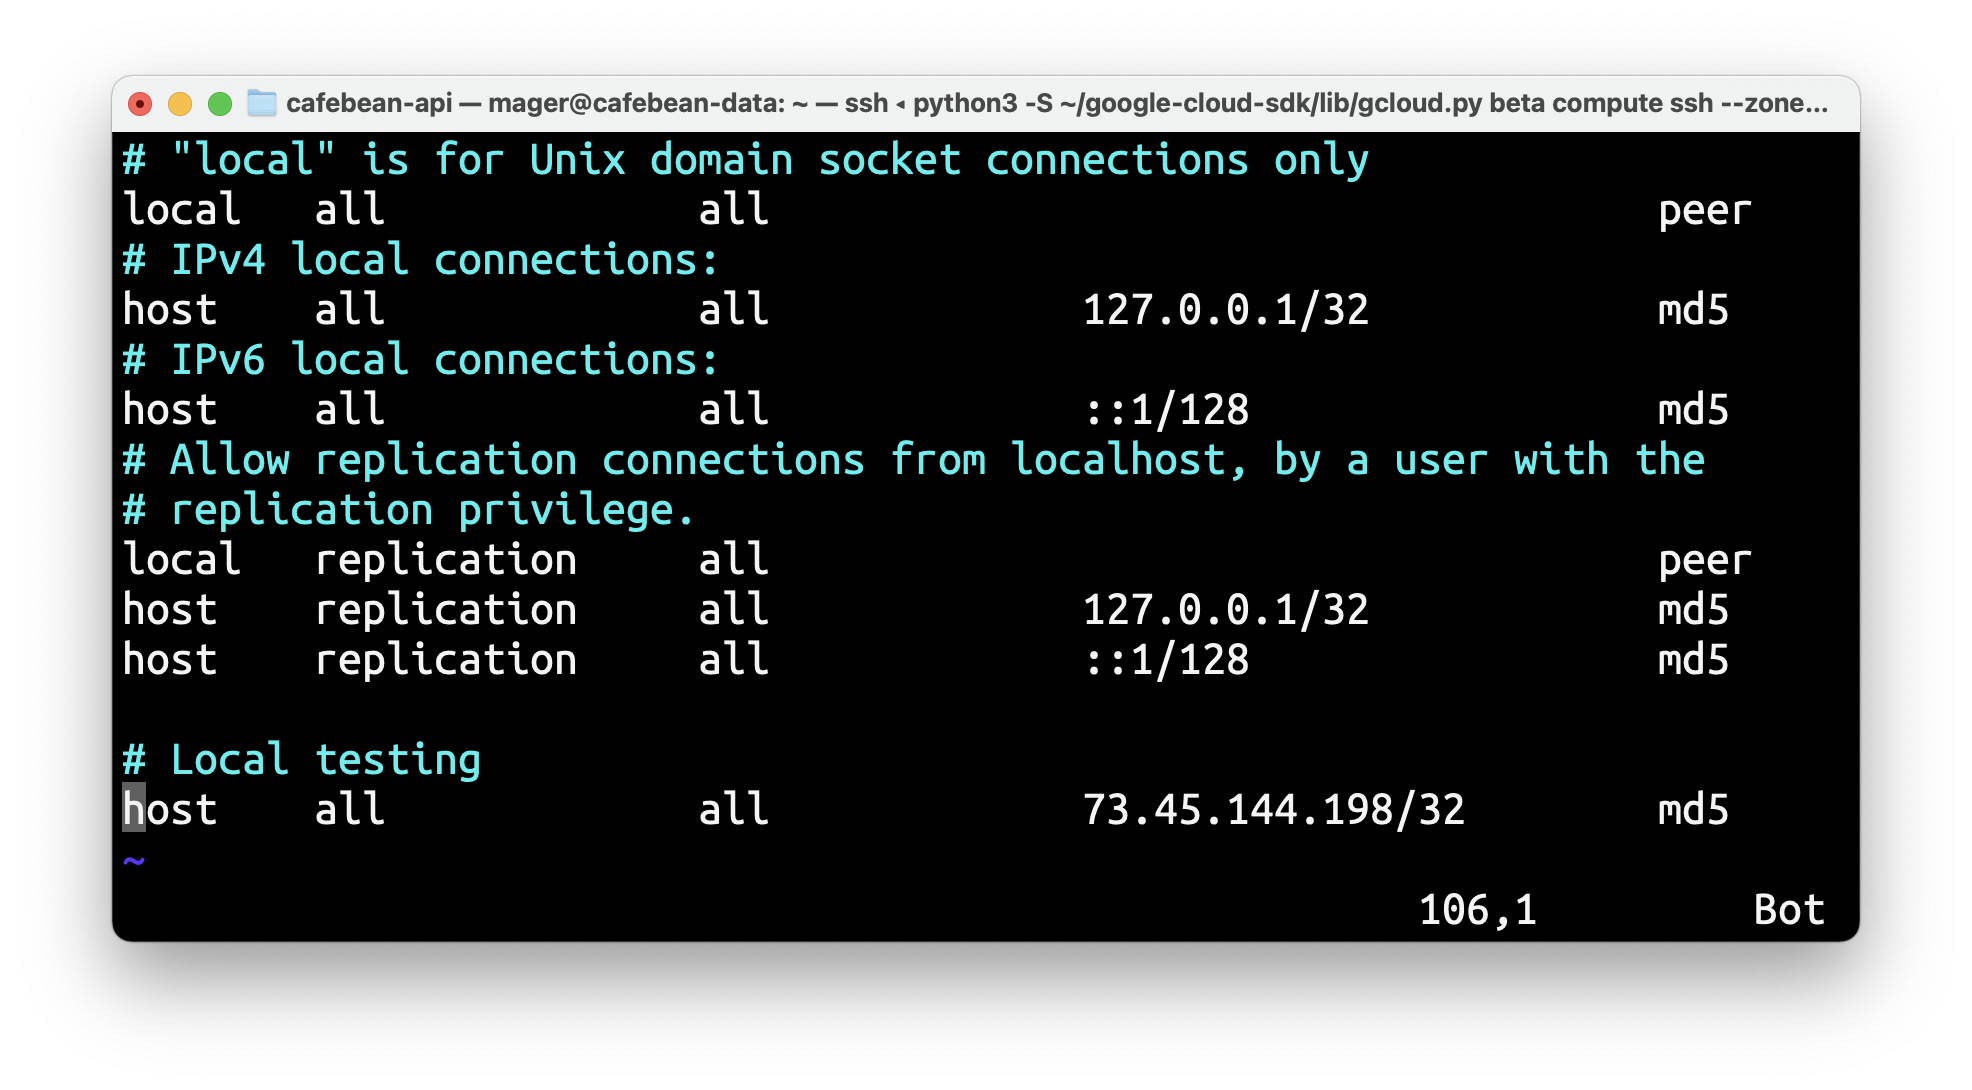
Don’t forget the /32 subnet suffix.
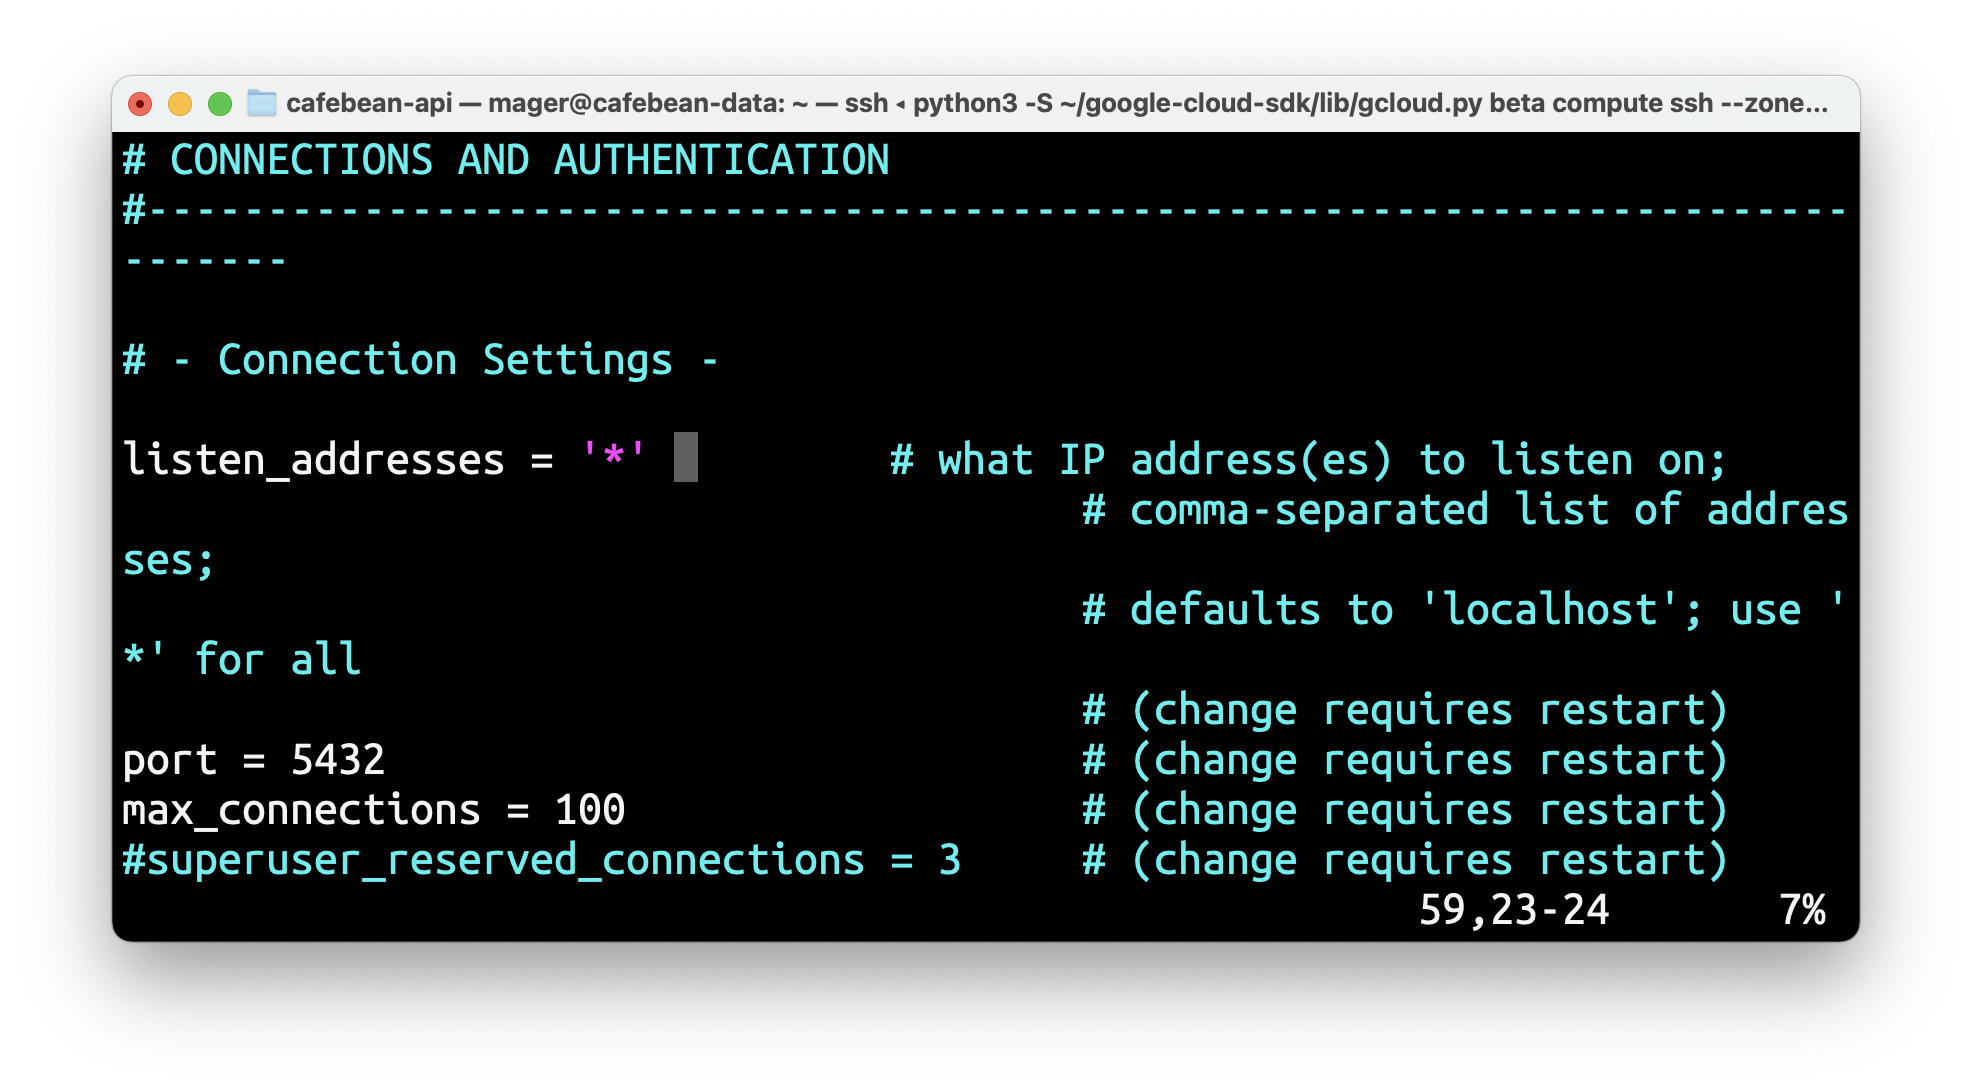
Save the file and exit the code editor. We have to update one more file, postgresql.conf, and tell it to open up traffic to all IP addresses. Since we updated pg_hba.conf in the previous step, it should only allow traffic to our IP.
> sudo vi /etc/postgresql/12/main/postgresql.confLook for the listen_addresses rule (around line 59) and set it to '*':
Save and close and restart Postgres:
> sudo service postgresql restartNext, we’ll create a firewall rule in GCP (do this from your local machine, not the ssh session):
> gcloud beta compute firewall-rules create cafebean-testing \
    --allow=tcp:5432 \
    --direction=INGRESS \
    --source-ranges=73.55.142.199/32 \
    --target-tags=cafebean-data
Verify that it was created with the command gcloud beta compute firewall-rules describe cafebean-data.
Now that your firewall rule is created, you should be able to connect to the instance with psql locally (you can install it with brew install postgresql). Find the external IP address of your instance:
> gcloud beta compute instances describe cafebean-data \
    --format='get(networkInterfaces[0].accessConfigs[0].natIP)'
And then connect (you will be promted for a password):
> psql -h 35.225.71.58 -p 5432 -U postgres -d postgres -WIf all goes well you should see the the postgres prompt. Feel free to run a query to test the data:

Talking to the instance from your Cloud Run app
The Cafebean API is hosted on Cloud Run, and by default, the service is hosted on a dynamic IP. This doesn’t work well with the security of our Postgres instance becasue it needs to know which IPs are allowed to access it. Luckily, it’s pretty easy to route all of your Cloud Run requests through a static outbound IP.
Here are the command I used to enable these network rules:
# Create a subnetwork
> gcloud beta compute networks subnets create cafebean-subnet \
    --range=10.124.0.0/28 \
    --network=default \
    --region=us-central1

# Create a VPC connector
> gcloud beta compute networks vpc-access connectors create cafebean-connector \
    --region=us-central1 \
    --subnet-project=cafebean \
    --subnet=cafebean-subnet

# Create a router
> gcloud beta compute routers create cafebean-router \
    --network=default \
    --region=us-central1

# Reserve a static IP address
> gcloud beta compute addresses create cafebean-api \
    --region=us-central1

# Create a NAT gateway
> gcloud beta compute routers nats create cafebean \
    --router=cafebean-router \
    --region=us-central1 \
    --nat-custom-subnet-ip-ranges=cafebean-subnet \
    --nat-external-ip-pool=cafebean-api
Now when I deploy a new version of the API, I add two new flags to the gcloud run deploy command:
> gcloud beta run deploy --image gcr.io/cafebean/cafebean-api \
    --platform managed \
    --vpc-connector=cafebean-connector \
    --vpc-egress=all
Once this is deployed, we can be sure that all API traffic is being served from a static IP.
❯ gcloud beta compute addresses list
NAME          ADDRESS/RANGE  TYPE      PURPOSE  NETWORK  REGION       SUBNET  STATUS
cafebean-api  34.67.158.60   EXTERNAL                    us-central1          IN_USE
Now we just need to update our Postgres pg_hba.conf file. ssh back into the instance and add your static IP to the list.
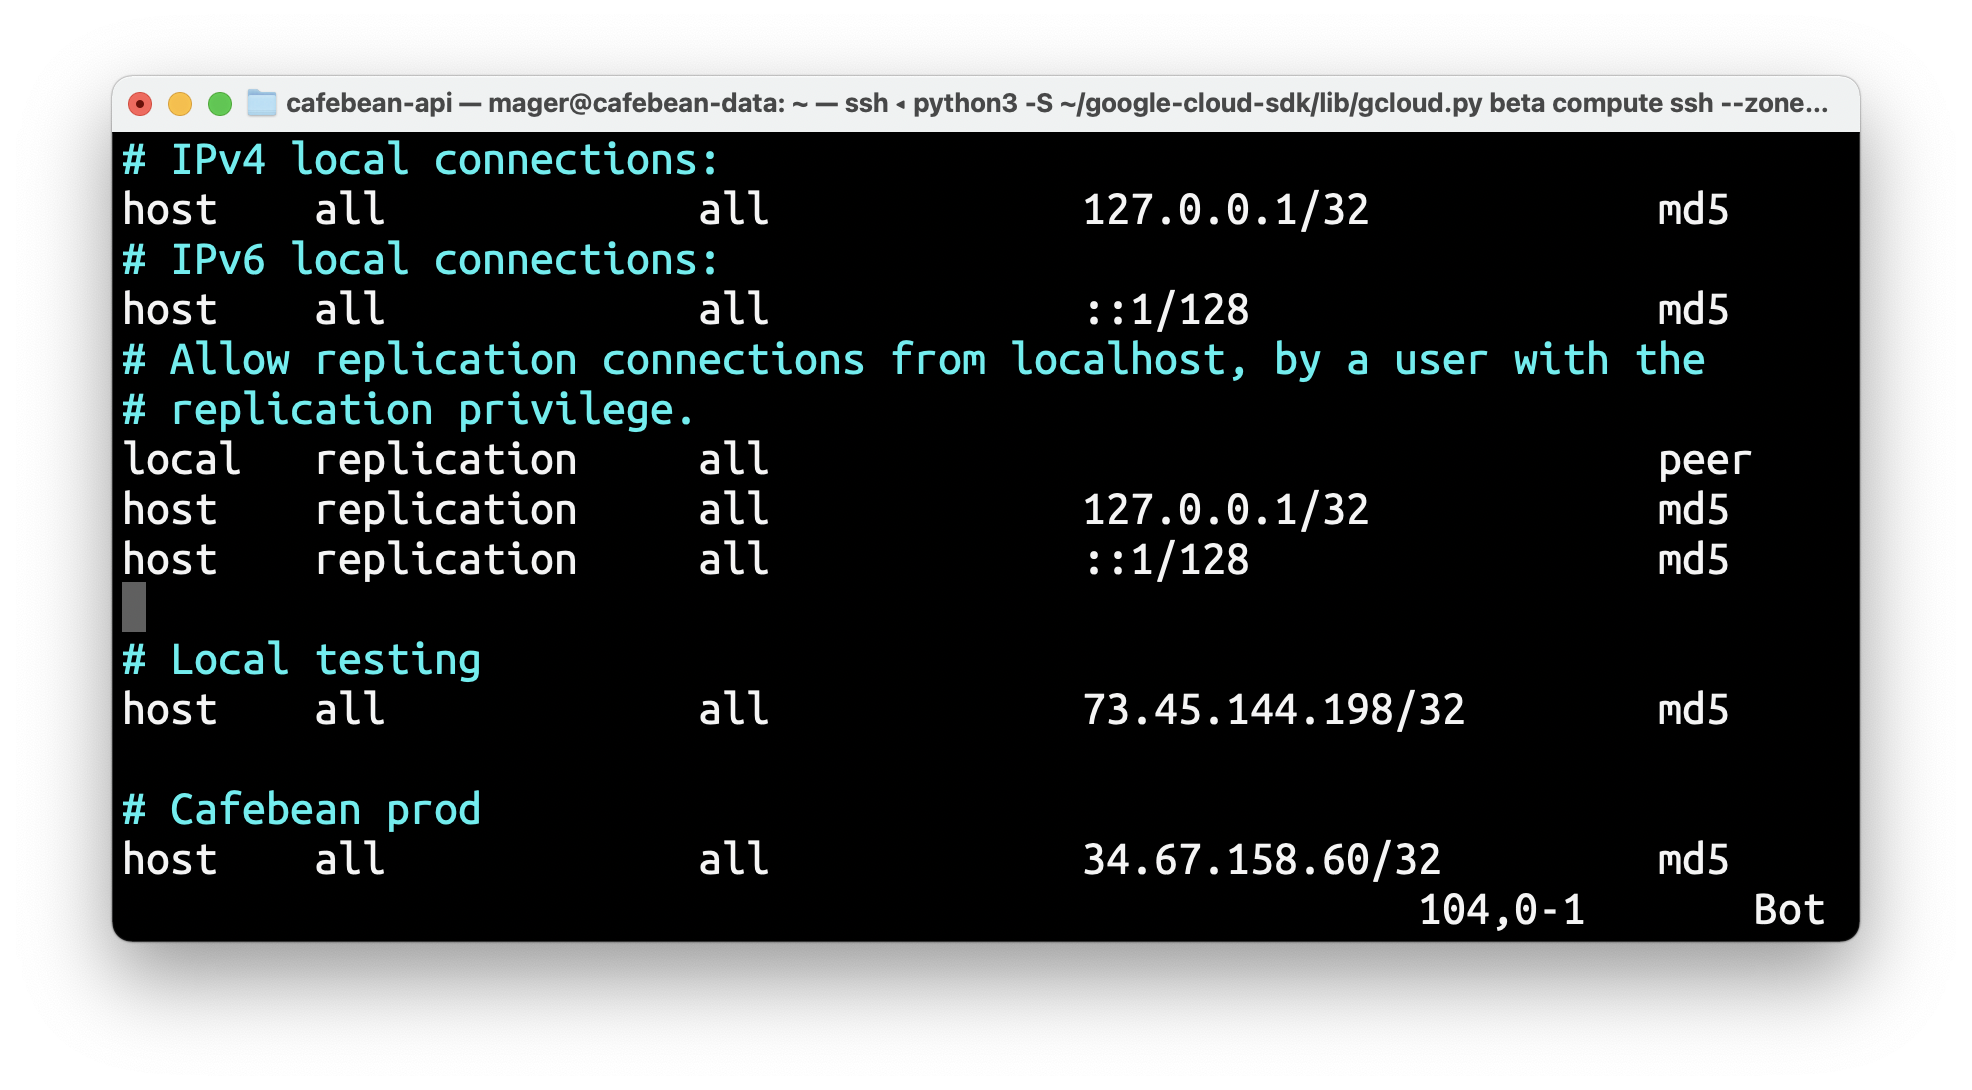
Restart your postgres instance:
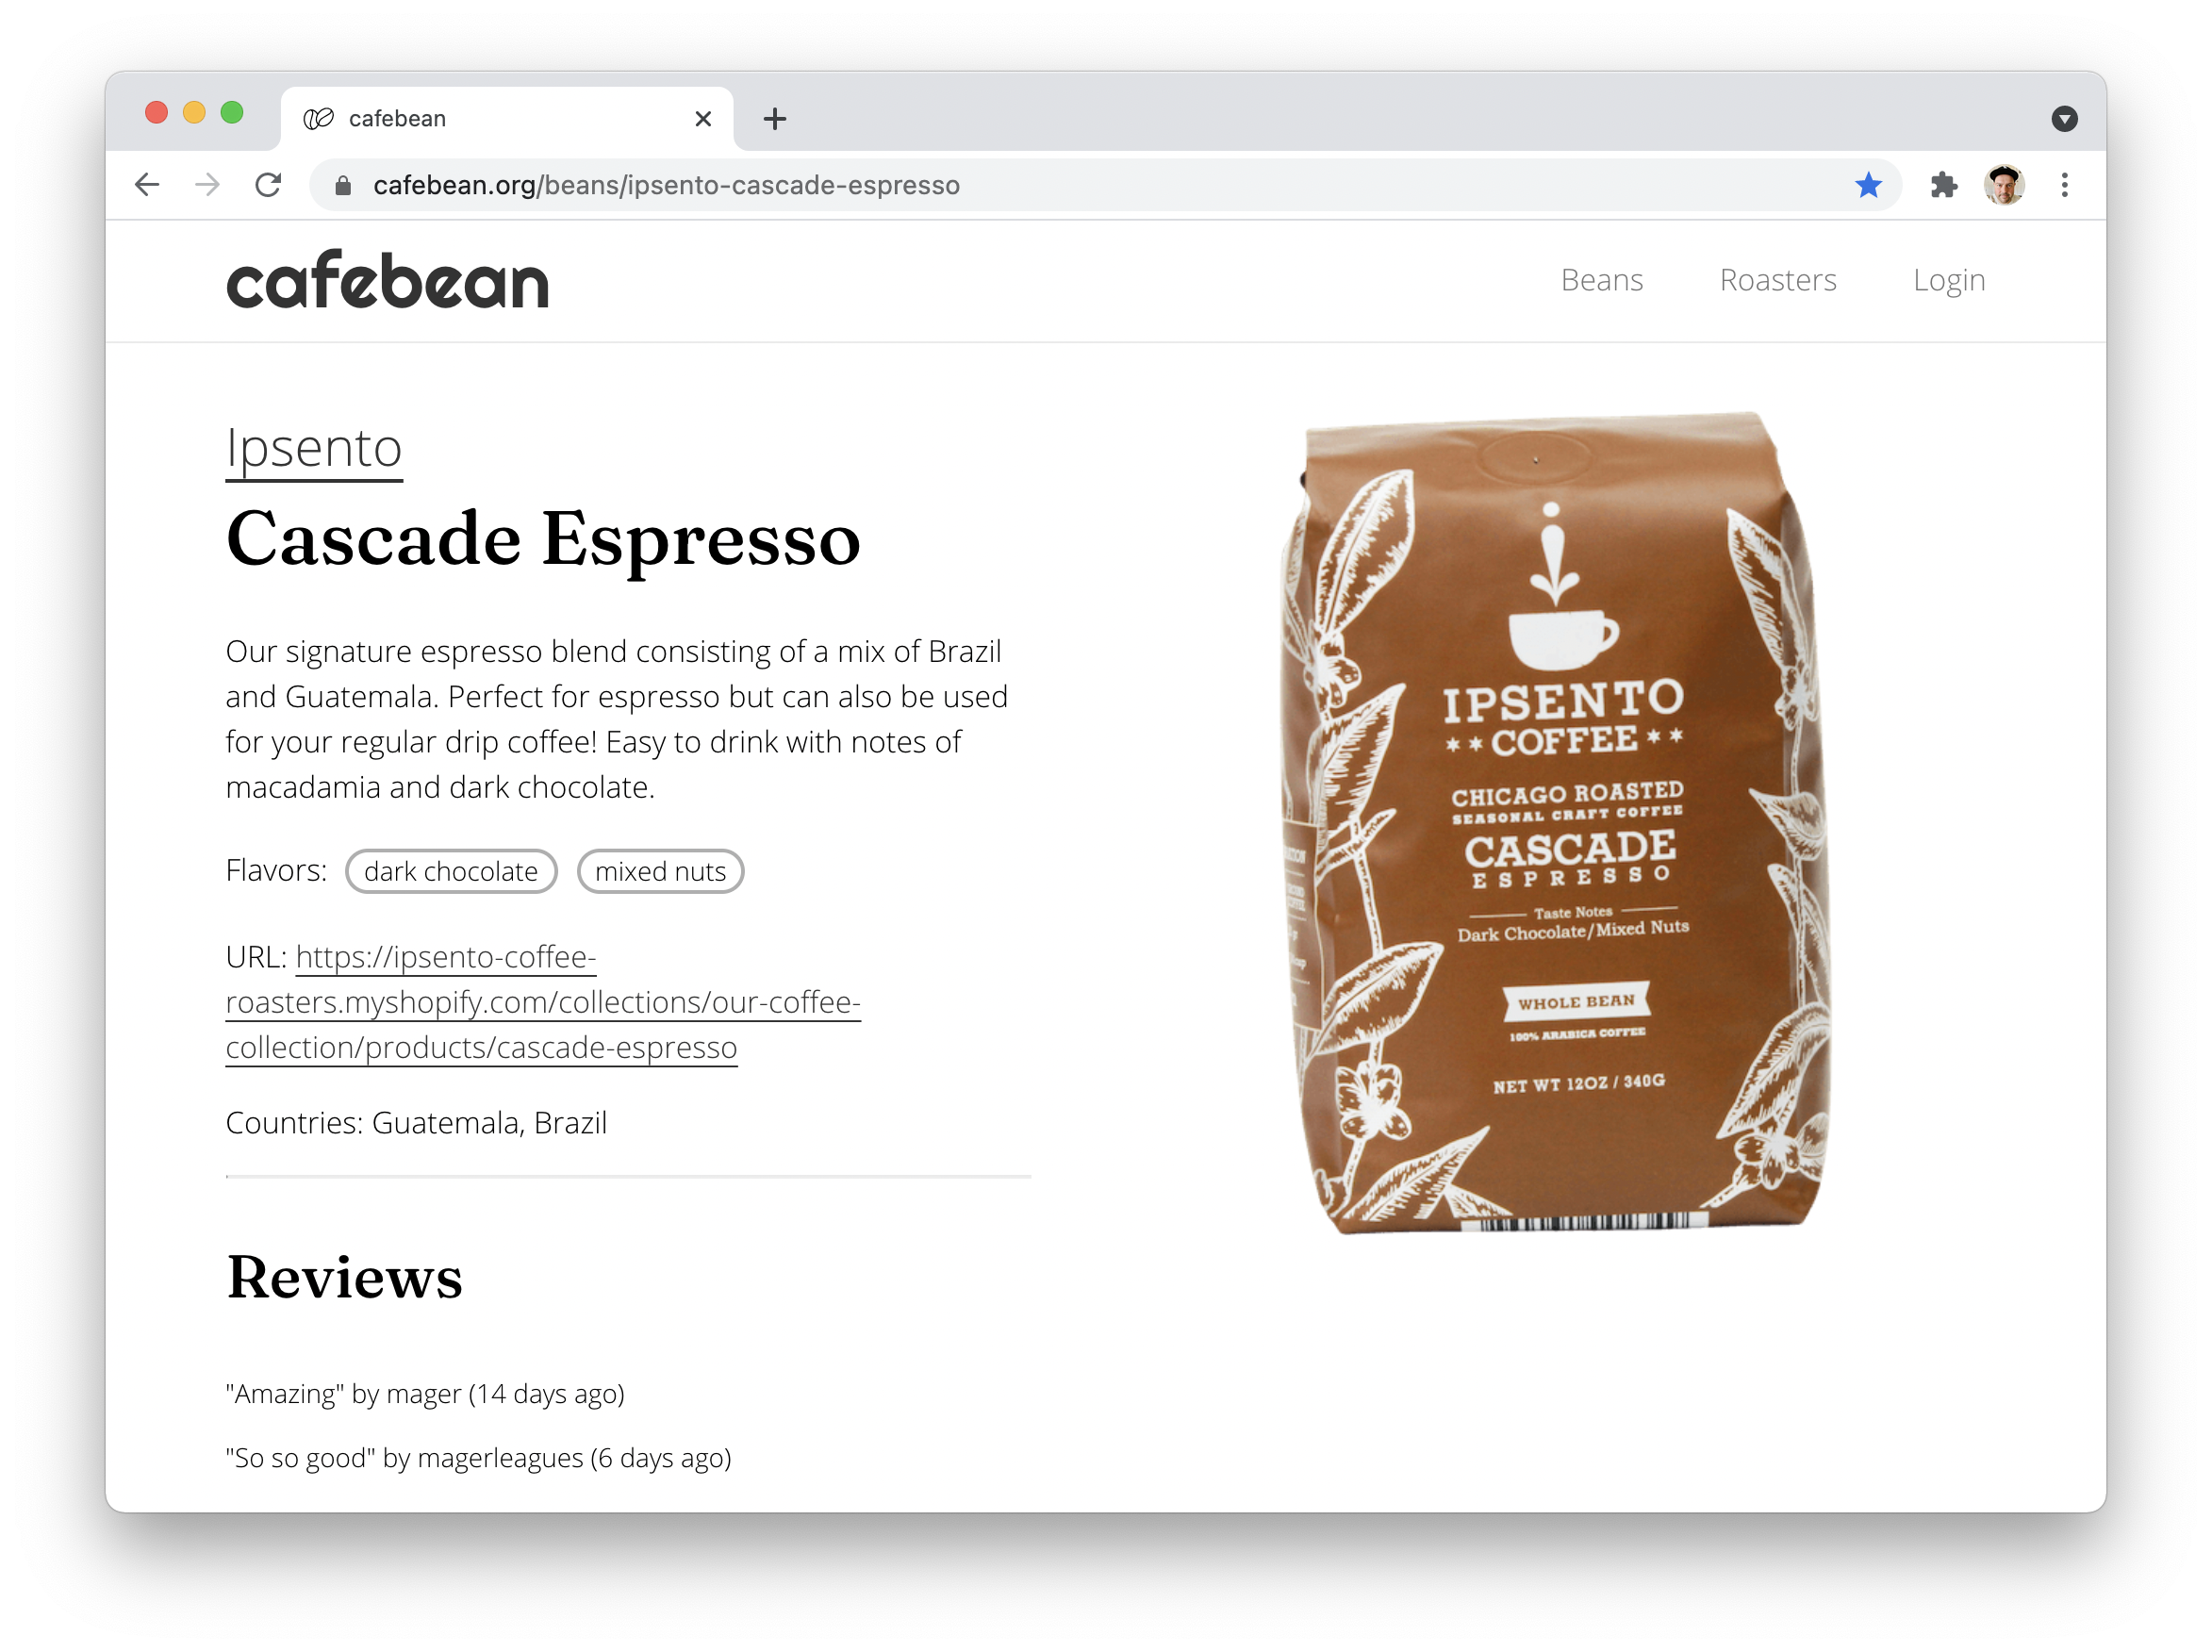
> sudo service postgresql restartThat’s it. Your Cloud Run app can now talk to the Postgres server. If you want to see it in action, make a request to the API to fetch all reviews, or check out the bean page for Ipsento Cascade Espresso, which I’ve been using for test reviews.
Conclusion
It was pretty easy to set this up, and it’s less expensive than Google’s hosted SQL option, and almost just as good.
I hope you learned something from this post. As always, feel free to reach out to me on Twitter if you have any questions or feedback.